
Embroidery Department in the Garment Industry
Embroidery is a decorative process that adds product value to the customer. Generally, Embroidery applies in one part of garments as per the buyer’s requirement, most of the time using a pocket or the back part of a shirt. Embroidery can be used in any type of Garment. An Embroidery pattern and an embroidery sample have to get approval from buying a house via a merchandiser before production starts. In this article, we discuss the Embroidery Department Process Flow Chart in the Garments Industry.
Most of the garment factories do not have their own Embroidery section; they outsource their Embroidery process by 3rd party Embroidery companies. Embroidery is a craft of decorating fabric by using a needle and various types of yarn or thread in a particular area of fabric. There is a process for how to deal with the external party, when to collect the approved design, and how to check. This article follows the Embroidery Process SOP and Flow Chart in Garments Manufacturing.
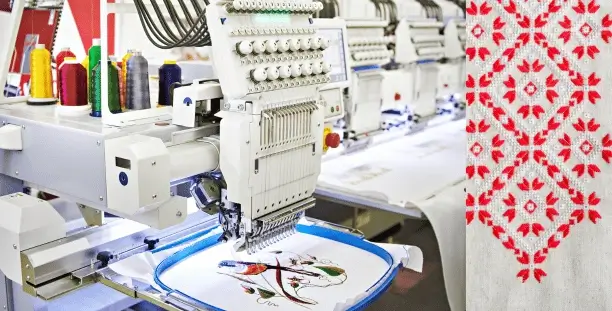
Embroidery department in the Garments industry
Embroidery is a decorative sewing process done by an embroidery machine, but it can not be done by a sewing machine operator. The cut panels are sent to the embroidery section for the embroidery process, and the panels are sent back to the cutting section to proceed with sewing. A pattern has to be set for an embroidery process as per the buyer’s requirements. Generally, embroidery is set in a special part of a garment. Nowadays, people around the world have become very fashion-conscious. All of the garments are both printed and embroidered. For that reason, the embroidery section now becomes a part and parcel of the garments section.
Embroidery Process Flow Chart in Garments Manufacturing
Monthly Embroidery Plan from the planning department
↓
Receive Body Panel from Cutting
↓
Receive Required Thread/Spec./Design /Pattern
↓
Check Approved Specifications
↓
All specifications match?
↓
Yes→ No Check with Merchandising
& Rectify
↓
Set Embroidery Machine
↓
Embroidery Operation
↓
Embroidery Quality Check
↓
Embroided as Per Specifications?
↓
Yes→ No→ Re-cut similar leftover fabrics→ Redo embroidery
↓ Body Panels Send for Fusing
↓
Send Embroidery parts for Sewing
Details of some important points of the Embroidery Department Process Flow Chart
Check Approved Specifications
- Buyer, File No. & Order Quantity.
- Measurement Specification
- Yarn Count Specification
- Fabric Color Approved Swatch
- Needle Size
- Thread Tex & Color
Set Embroidery m/c
- Program/SPI
- Needle
- Thread
- Pattern
- Interlining
Embroidery Quality Check
- Embroidery Placement
- Serial No.
- Defects/Alteration
- Metal Detection (as per Buyer Requirement)
Embroidery process Flow chart
The flow chart is briefly discussed below. In the embroidery Section, many steps are followed. Each step is described below shortly:
Monthly embroidery plan from the planning department:
The planning department arranges the whole process, which will be done for the coming order. They provide service on a fixed date, and all critical issues are determined by the planning department. The planning department makes a plan on a weekly/ monthly basis, which style to use after which style. A planning sheet also includes a work deadline for Embroidery.
Received Body Panel from Cutting:
An Embroidery section receives a cut panel from the cutting section. Embroidery is done on specific cut parts of garments. So the cutting section sends those specific parts to Embroidery for Embroidery operation
Received Required Thread/Spec/Design/Pattern:
For the purpose of embroidery, they received the required thread, specimen, or design book or pattern. Without receiving the required material, they cannot start embroidery. All necessary Thread/Spec./Design /Pattern must be ensured before the process starts.
Check Approval Specification:
We are just bound to submit the ordered goods. So, before going to production, the approval specification is checked very carefully. All specifications should match the Approved Specifications. If not matched, No Check with Merchandising & Rectify
All specification matches:
The embroidery authority checked the specimen very carefully and found the variation. They are all specifications.
Set the embroidery machine:
If all specifications match, set the embroidery machine. If not match check with merchandising and rectify. Setting an embroidery machine for performing the embroidery operation
Embroidery Operation:
In this step, the embroidery operation started with a small amount. Quality must be ensured as per the buying house approval if the panel should be recut and embroidered again.
Embroidery QC:
In this step, the QC checked the embroidery. They match the produced product with the specimen. If okay, go for body panel sewing. If not okay, recut similar leftover fabrics and prepare for further embroidery.
Body panel sends for Fusing:
If QC passes, then the body panel is sent for fusing when the fusing operation is applicable on the part. This operation can reinforce the embroidery area.
Send embroidery parts for sewing:
After completing embroidery according to the specification, the embroidered parts are sent for sewing. Through the sewing process, the embroidery panel joins the garments from a separate part.