Preparing a logo correctly saves time and money. A well-prepared logo stitches cleanly the first time. This article gives a simple, step-by-step method. Each step is short. Each step is practical. Use these steps before you digitize or send a logo to production. This article is all about How to Prepare a Logo for Embroidery in 7 easy practical tips.
Step 1 — Decide the final stitched size first
Start by choosing the final size. This is the most important choice. A design that looks good on screen can fail when stitched small. For chest logos choose 3–4 inches wide. For caps, aim for letters at least 3–4 mm tall. If the design has fine detail, keep it above 2.5 inches, best guide you can find at DigitizeStitcch. When you fix size early, you set correct stitch length and density. You also avoid re-digitizing later.
Step 2 — Make the artwork stitch-friendly
Open your logo in vector software. Convert text to outlines. Clean extra nodes and reduce tiny shapes. Remove gradients and complex blends. Embroidery reads solid shapes best. When a logo uses a thin font, thicken it by 0.5–1 pt. For script logos, close gaps between letters and simplify long swirls. Keep the number of separate color areas low. Fewer color blocks mean fewer thread changes and faster production.
Step 3 — Choose fonts and simplify typography
Simple fonts work best. Use rounded, medium-weight sans serif fonts for clarity. Avoid thin serif or ultra-condensed fonts. When a brand requires a thin font, convert the text to a filled shape and increase the stroke. For monograms and numbers consider embroidery-ready fonts. These fonts are built to keep legibility at small sizes and reduce stitch issues.
Step 4 — Pick stitch types and set smart defaults
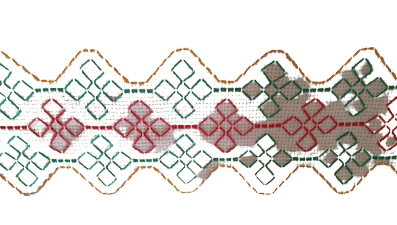
Choose stitch types based on shape and size. Satin stitches work well for borders, lettering, and any shape that is 2–12 mm wide. Use tatami (fill) stitches for larger, flat areas. Use run stitches only for very thin lines or fine details that will not be scaled small.
Practical density guide: for polyester thread on woven fabric, set tatami density around 4.5–5.5 stitches per mm. On knits, drop density by 10–15% to keep the fabric flexible. For satin, aim for a stitch length around 3–7 mm, depending on the satin width. These numbers are starting points. Always adjust for thread type, fabric, and stabilizer.
Step 5 — Underlay, pull compensation, and stitch direction
Underlay is the hidden base that supports the top stitches. Add edge run underlay for all satin edges. Use a cross or zig-zag underlay for large fills. Underlay prevents sinking and keeps the surface flat.
Pull compensation fixes the way corners look after stitching. When stitches pull fabric inward, corners shorten. Add a small amount of pull compensation on outside corners. A practical approach is to test 0.2–0.5 mm compensation at first and adjust by sight.
Set stitch direction to follow shape flow. Changing direction between sections avoids banding in large fills. Soft changes in direction create a textured look and hide machine banding.
Step 6 — Stabilizer and hooping: match fabric, not just design
Select stabilizer based on the fabric. For knit shirts and polos use a cut-away stabilizer. For woven shirts and bags a tear-away stabilizer often works. For delicate fabrics or for floating designs use water-soluble film.
Hooping matters. Use the smallest hoop that fits the design. A smaller hoop controls movement and reduces distortion. Hoop fabric tight, but do not stretch it. For caps, use cap-specific hoops and stabilize the crown per the machine guide.
Step 7 — Test-sew and document results
A test-sew reveals issues that software previews miss. Always test on the same fabric, stabilizer, and thread you will use in production. Before you run the test, note these items: needle size, thread brand and weight, stabilizer type, hoop size, and machine speed.
Use this short test-sew report format in your notes: a one-paragraph summary of what worked, and a one-line list of adjustments made. For example: “In the first test the left side showed slight puckering. Solution: switched to cut-away stabilizer and added edge run underlay. Final stitch count: 6,420. File saved as clientname_logo_3in_6420.dst.”
Real example (mini case study)
A small apparel shop sent a 2-inch logo with thin serif text. The first sew showed broken letters and pull. The solution was to increase the logo to 3.25 inches and to thicken the fonts by 0.7 pt. We used a satin stitch on the letters, set tatami at 5.0 st/mm for the background, and used cut-away stabilizer. The second sew was clean. This shows: resizing and small art fixes often solve the biggest problems.
Practical file and production workflow
Keep a consistent file naming system. A clear name saves time and prevents errors. Use this pattern: YYYYMMDD_client_design_size_stitchcount.machineformat. The date helps find the latest version. Keep at least two files for each project: the original vector (AI or SVG) and the machine file (DST or PES). Also export a 300–600 DPI PNG as a proof image for your client.
Production tips: batch jobs that use the same thread colors. This saves significant time. Keep a short library of approved, tested logo files for common sizes like chest, cap, and sleeve. Reuse these when repeat orders arrive.
Common problems and how to fix them
Puckering usually means stabilizer or underlay is wrong. Switch stabilizer type or add underlay. Thread breaks hint at wrong needle size or old thread. Change the needle and test again. Blurry letters mean density or font choice is wrong. Raise the letter height or use a bolder font.
How to present files to a digitizer or vendor
Give clear instructions. Tell them the final size, the fabric type, and the preferred thread brand if you have one. Attach the vector file and a proof PNG. If you want a specific stitch look (for example, visible texture in a fill) say so. If you expect multiple colorways, include those color codes.
Quick checklist before production
Make sure the final size is locked. Confirm hoop size and stabilizer. Convert fonts to outlines. Export machine files with a clear name. Run a test-sew and save the report.
Where to get help and a tested service
If you want a professional digitizing partner, visit DigitizeStitch. They provide fast, tested digitizing, test-sew reports, and multi-format exports. See examples and pricing at https://digitizestitch.com/.
FAQs
Q: Can I embroider very small logos? A: Yes, but keep them simple. For readable text, aim for 2.5–3 inches. For simple shapes you can go to 1.5–1.8 inches.
Q: What needle size should I use? A: Use a 75/11 or 80/12 for most woven fabrics. Use a 90/14 for heavy fabrics. Use a ball point needle for knits.
Q: How many colors are too many? A: More than 6–8 colors adds time and cost. For cost control keep logos to 4–6 colors when possible.