
10 Points to Consider in Spreading Inspection
Spreading Inspection
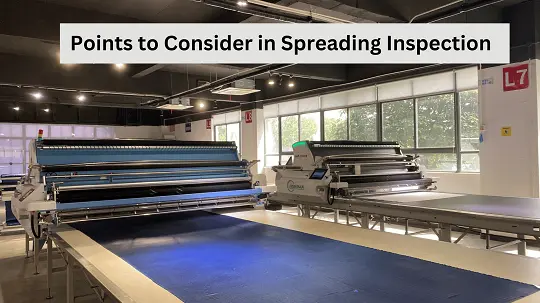
Spreading though not considered an important operation in garment manufacturing and is normally carried out manually without the supervision of the cutting master, is a critical checkpoint. The post-sewing measurement defects found in a garment can in most cases be attributed to correct spreading and cutting. It involves inspecting several aspects of the fabric as it is being laid out on the spreading table in multiple layers (plies) according to the garment marker. In this article, we explain 10 Points to Consider in Spreading Inspection.
Fabric spreading in the garments industry is not all about spreading and cutting. Spreading quality maintaining is mandatory for the cutting process. If we can control spreading, we can control cutting.
Objectives Spreading in Garments:
- To ensure that all garment parts are cut as per the pattern.
- The decision to re-cut the garment parts.
- Increased productivity of the sewing room.
10 Points to Consider in Fabric Spreading Inspection in the Garments Industry
In the case of a marker always compare the marker with the original pattern. While spreading, the quality assurance inspector is to check the fabric lay for the following defects:
- Marker making: To make sure that all parts of a particular garment appear on the marker, check for the smaller parts [collars/cuffs] and their presence in pairs.
- Marker Placement: To check that the marker is placed on the spread with the edge parallel to the selvage of the piece of goods. Also to ensure that all cut pieces are complete.
- Table Marks: Check the table for all table marks. Allow no minus tolerance for splicing (a minimum of one inch of overlap).
- Markers: To ensure that the marker is not creased, damaged, or has overlapped parts.
- Marker Blueprint: To make a random check of some measurements in the marker. Sometimes while making a blueprint of the marker, unknowingly the marker gets pulled and the sizes get distorted.
- Spread Height: To ensure that the height of the spread is at least two inches less than the cutting blade knife. In the case of knits, to ensure that the ply height is stable. Fabric-to-fabric cutting height differs in the garments industry.
- Narrow Goods: After completion of the spread, check the far edges of the spread to see that all piles extend beyond the marker line.
- Tension and Creasing: To ensure that there is no artificial/excessive tension due to a very tight spread. Also to check randomly for any creasing of the fabric.
- Leaning: To check that one edge of the fabric is square to the tabletop. Visually inspect to ensure the alignment of the edge with the tabletop.
- Count: To check the count after completion of spreading, and before cutting. Count all plies at both ends. There is no tolerance for this.
Inspecting these aspects during spreading helps prevent errors that would translate into garment defects later in the production line. This ensures better material utilization, minimizes fabric waste, and maintains the quality of the finished garments. These are the key Points to Consider in Spreading Inspection.
- You may love to read: Fabric Spreading Process in Garments Industry
- Major Problems in Fabric Spreading
- Shade Marking and Inspection in Fabric Spreading