
12 Sewing Machine Problems, Causes, and Their Remedies
As simple as it may appear, a sewing machine is one of the most challenging machines to master. When running at 3500 rpm, simple neglect can influence the stitch in the cloth, resulting in a decrease in quality. When a garment has a flaw, there must be a reason for it. We’ll call it a sewing machine problem until we figure out what’s causing the malfunction. A machinist must know the potential treatments for these prevalent causes to take preventive action against them. In this article, we present 12 Sewing Machine Problems, Causes, and Their Remedies.
It is uncommon to observe a stitch malfunction caused by a Sewing Machine problems. Most of the time, it is caused only by the operators’ hasty actions. However, current sewing machines are so well-made that only a few tweaks are required to get everything precisely perfect. Often, a simple check of the threading, machine components, and thread tension is all that is required to achieve the desired stitch. The following are some of the most common sewing mistakes and machine issues, along with their causes and solutions.
12 Sewing Machine Problems, Causes, and Their Remedies
1. Thread break
Causes:
- A sudden jerk occurred during sewing.
- A manufacturing flaw in the needle, causing the ‘eye’ to be rough.
- Using low-quality thread
- Thread wrapping around the spool holder
Remedies:
- The machine starts up uniformly and smoothly.
- Use a high-quality needle and replace it at regular intervals.
- Make use of high-quality thread.
- Thread the machine properly.
- Make use of the recommended thread
2. Missed or irregular stitch
Causes:
- Needle inserted incorrectly
- Inadequate pressure on the pressure foot
- needle that has been blunted or twisted
Remedies:
- For appropriate needle insertion, consult the handbook.
- Boost the pressure
- When the needle becomes damaged, it must be replaced.
3. Fabric is not moving forward
Causes:
- Stitching has bunched, resulting in a lump.
- Feeding teeth are not raised
- Pressure on the pressure foot is negligible.
Remedies:
- lengthen the stitches
- Feed teeth that have been raised
- Increase the pressure in the pressure foot.
- lengthen the stitches
4. Needle break
Causes:
- A needle placed incorrectly
- Fabric is pushed or pulled through the machine.
- Foot attachment error
Remedies:
- Insert the needle as specified in the manual and allow the cloth to feed normally.
- Attach the foot as needed.
- Examine the needle plate.
5. Machines fail to turn on
Causes:
- The machine’s switch was not switched on, or there was insufficient power available.
Remedies:
- Examine the switch and power supply.
6. Puckering
Causes:
- The zig-zag is too wide for the fabric’s thickness.
- Stitch length is too long for the thickness of the fabric.
- Thread tension that is too high
- SPI (stitch density) is high.
Remedies:
- Alter the stitch width to be narrower.
- Switch to a shorter stitch length.
- Examine the thread tension
- Set the SPI based on the material.
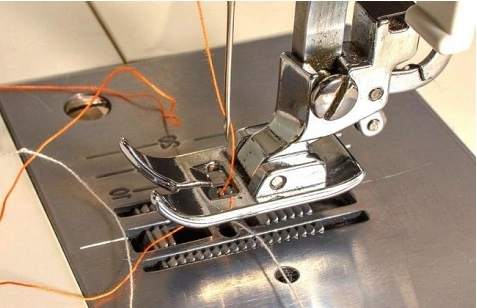
7. Birds nesting
Nesting birds entails looping on the back of the fabric and along the bobbin region.
Causes:
- The machine’s threading is incorrect.
- Inadequate pressure on the pressure foot Balance wheel rotated clockwise
- The needle thread did not go through the take-up lever.
- Due to filth in the tension disk, the thread is not passing properly.
Remedies:
- Rethread the machine properly.
- Pressure should be checked and controlled.
- The balance wheel should always be rotated counter-clockwise.
- Rethread the machine correctly.
- Check for thread insertion between tension disks and clean them while you’re at it.
8. Fabric gets pushed down through the needle plate into the bobbin area
Causes:
- The fabric is good.
- The needle is blunt.
Remedies:
- Make adjustments with the pressure foot, such as using a straight stitch foot and needle plate for a straight stitch.
- Replace the needle
9. Thread not locking in the fabric’s center
Causes:
- The weight (thickness) of the two threads (needle and bobbin thread) is unbalanced.
- The top and bottom tensions are not properly balanced.
Remedies:
- Use the same thread or threads with similar qualities.
- Alter the tension of both the needle and the bobbin thread.
10. Stitches clump together at the start of sewing
Causes:
- Beginning to sew too quickly without lowering the pressure foot
- preventing the fabric from freely feeding beneath the foot
Remedies:
- Begin smoothly by correctly positioning the pressure foot. While starting to sew, keep the threads held taut at the back of the foot.
- Do not cling to the fabric.
11. Jamming and knotting of machines
Causes:
- Thread or a broken needle became entangled in the raceway.
Remedies:
- Clear out the bobbin area.
12. Fabric is not Feeding
Causes:
- Inactive drop-feed setting
Remedies:
- Correct Pressure Setting
Conclusion
Sewing Machine Problems can cause issues such as tangled threads and damaged needles. These occur for a variety of causes, but don’t worry! There are simple solutions. Always double-check your machine and use the appropriate thread and needle. If you are having difficulty, get assistance or consult a guide. Keep practicing, and you’ll be a sewing pro in no time! Don’t be discouraged—sewing is enjoyable, and with a little patience and experience, you can fix any challenge! Have fun stitching!